
Overview
Component name: In-Page Alert
Authors who can use component: any
Templates/page types that can use component: all
Required or optional: optional

Authoring Fields
Creating an In-Page Alert as a Content Fragment
1. From the landing Navigation page, click on Content Fragments.

2. On the left hand panel, select the folder where the CF is needed. It can be used by any pages in this folder. Once selected, click “Create” in the upper righthand corner.

3. New Content Fragment
a.Location pathfinder: This field shows the URL of the folder selected in Step 2. It does not need to be edited.
b. Content Fragment Model dropdown: Select “In-Page Alert.”
c. Properties fields
i. Title: Optionally provide a title for your Alert. Adding a title automatically creates a name as well.
ii. Name: Provide a name for your Alert. Only mandatory field in Properties.
iii. Description: Optionally provide a description for your Alert.

Editing the In-Page Alert Content Fragment
1. Alert Type dropdown: Select from Informative, Warning, and Critical.
a. Informative: These alerts are blue, with an information icon. Use neutral alerts for important time-sensitive information. Examples: important dates, recent content updates, new policies or system notifications.
b. Warning: These alerts are yellow, with an alert icon. Warning alerts tell the user something urgent or help the user avoid a problem. Examples: travel information, content trigger warnings or location closures.
c. Critical: These alerts are red, with an error warning icon. Critical alerts should only be used for active emergency situations that could pose a health or safety risk. Examples: severe weather threats or natural disasters.
2. Title field: Add a title to display on the Alert.
3. Title Heading Level dropdown: Select from h2 – h6. The Alert can be placed anywhere on a page; choose H-level accordingly.
4. Start Date and Time picker: Select the date and time that the Alert should begin displaying on the page. The Alert will not display on the page until the start time has passed.
5. End Date and Time picker: Select the date and time that the Alert should disappear from the page. If no end date is authored, the Alert will remain on the page.
6. Description field: Add a description to display on the Alert. Keep the description short and direct, with 140 characters maximum. Do not add links here- they should go in the link fields below.
7. Link Label field: If adding a CTA, use this field to add a link label to display on the Alert’s CTA button.
8. Internal Link URL: If adding an internal CTA, use the "Add content path" pathfinder to link to another page on the site. This page may contain more information about the Alert’s contents, or may have an action for residents to take. Only one of Internal and External Link URL fields may be filled.
9. External Link URL: If adding an external CTA, add the link here. Only one of Internal and External Link URL fields may be filled.
10. Disable Close selector: If toggled off, the Alert has a close icon, and may be dismissed. If toggled on, the Alert has no close icon, and cannot be dismissed from the page. Default off.


11. From the top right corner, select Publish.
12. From the Publish 1 Content Fragments modal, select “Publish service” and “Publish.”
13. The Alert CF is now published.
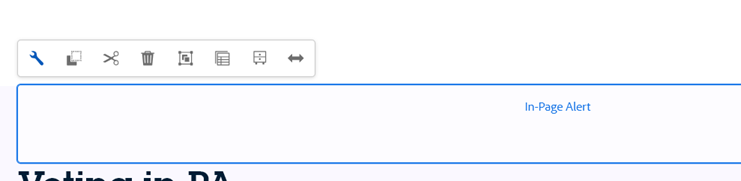
Adding the In-Page Alert component to the page
1. Once on the desired page in Edit mode, add the In-Page Alert by doing the following:
a. Option 1- double click on “Drag components here.” A modal titled “Insert New Component” will pop up. Type “In-Page Alert” in the search bar, or scroll to the In-Page Alert in the list. Double click to add to page.
b. Option 2- on the left hand rail, navigate to the Components tab. Type “In-Page Alert” in the search bar, or scroll to the In-Page Alert in the list. Double click to add to page.
2. With the edit wrench, open the component.
3. Alert Content Fragment pathfinder: Select the Alert which should display on the page.
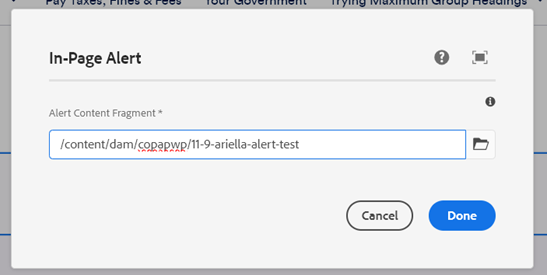
4. Click “Done.”
5. The Alert now appears on the page. View it before publishing by selecting “View as Published” from the Page Information Menu (in horizontal menu, click icon with 3 slider buttons, and select from dropdown).

Accessibility
- In-Page Alerts can be added anywhere on the page. Make sure to configure heading level (h2-h6) accordingly.
Other tips
- Do not use Alerts for emphasis of regular content, such as job postings. Alerts should be used only for timely, urgent notifications.
- Make sure to keep time-sensitive Alerts up only for the duration of the crisis.
- Alerts should describe the impact on the resident, as well as actions they should take.
- Limit the amount of text in an Alert. Write concise headings and copy, and include only one link per Alert.
- When possible, do not stack Alerts.
- On the CF authoring dialog, a “Statistics” button appear below the Description field. Click to view the Alert’s word and character count.